OIDC
Edition: Enterprise
Docmost supports authentication through OpenID Connect (OIDC), allowing integration with any identity provider that supports the OIDC standard.
How to configure OpenID Connect (OIDC):
-
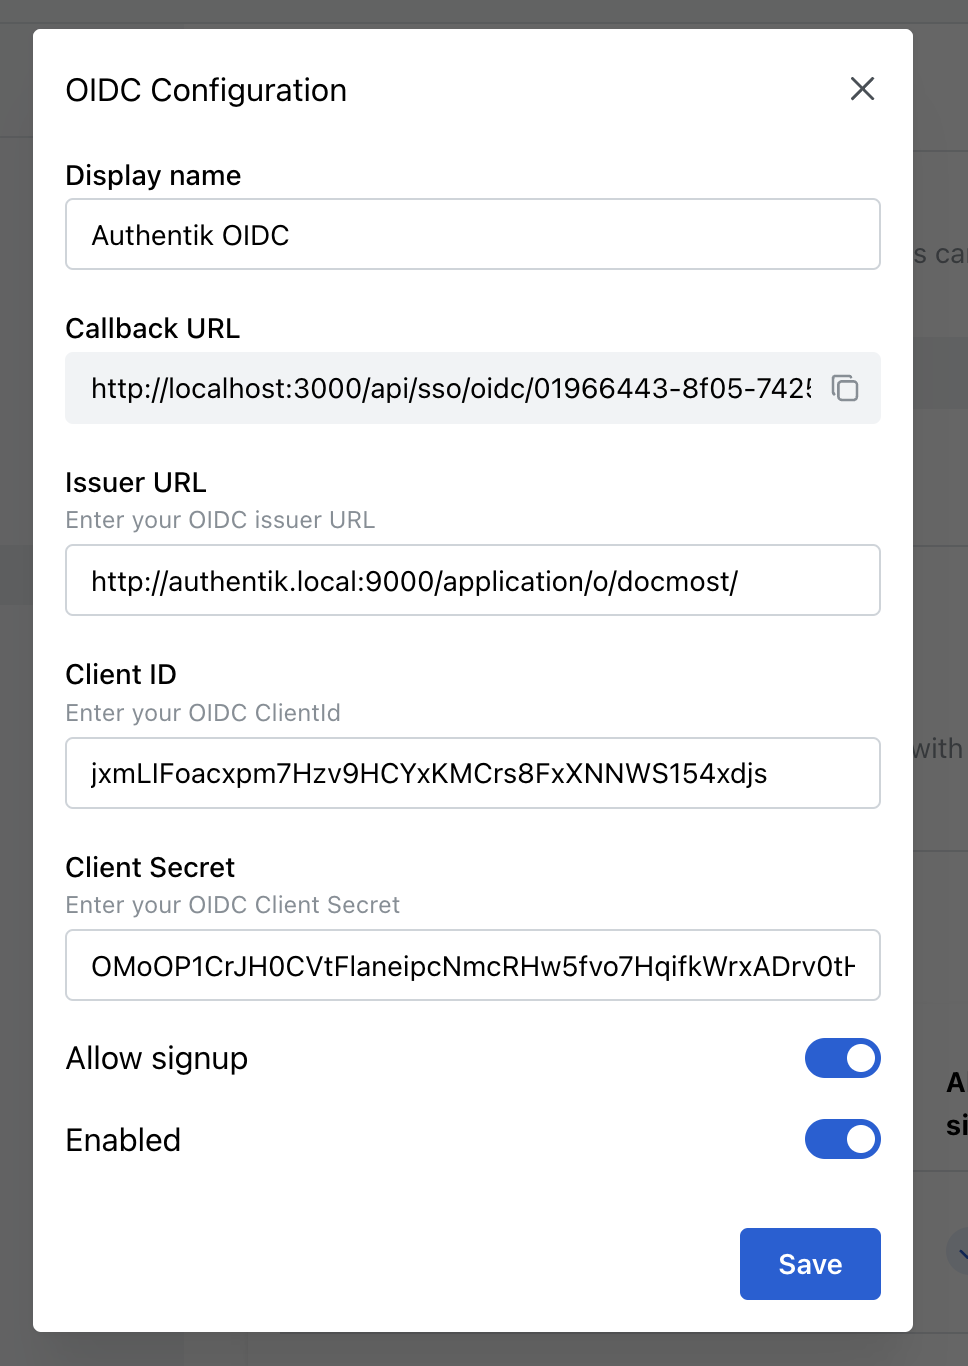
Navigate to Security Settings
- Go to Settings → Security & SSO in your Docmost dashboard.
-
Create a New SSO Integration
- Click on the "Create SSO" button.
- Select "OpenID (OIDC)" from the dropdown menu. This opens a configuration popup.
-
Configure Your OIDC Integration
- Enter a descriptive Display Name for this integration (e.g., "Company SSO").
- Copy the provided Callback URL. You’ll need to add this URL to your OIDC provider’s allowed redirect URIs.
-
Enter Your OIDC Provider Details
- Issuer URL: Provide the Issuer URL from your OIDC provider.
- Client ID: Paste the Client ID obtained from your OIDC provider.
- Client Secret: Paste the Client Secret obtained from your OIDC provider.
-
Additional Configuration Options
- To automatically provision users upon their first login, enable the "Allow Signup" toggle.
- To activate this integration immediately, enable the "Enabled" toggle.
-
Save Your Configuration
- Click "Save" to apply your settings.
After successful configuration, your OIDC provider will appear as an available login method on the Docmost login page. Users can now authenticate through your configured OIDC integration.
Group Synchronization
How Group Sync Works
When group synchronization is enabled, Docmost automatically manages user group memberships based on the group claims returned by your OIDC provider on each login.
Docmost reads groups from the groups or roles claim in the userinfo response. The claim can be an array of strings or a single comma- or semicolon-separated string.
⚠️ Groups must be pre-created in Docmost: OIDC group synchronization does NOT create new groups. You must manually create groups in Docmost with names that match the values returned by your IdP. Matching is case-insensitive.
Setting Up Group Sync
-
Configure your OIDC Provider to include a
groups(orroles) claim in the userinfo response or ID token. Most providers (Okta, Keycloak, Auth0, Microsoft Entra ID) require an explicit scope or claim mapping to be added. -
Create Groups in Docmost:
Example OIDC groups claim:
{
  "groups": ["Engineering", "Marketing", "HR-Team"]
}

Create corresponding Docmost groups:
- Engineering
- Marketing
- HR-Team
Learn more about Docmost Groups Documentation.
-
Enable Group Sync in the OIDC provider configuration.